This was most definitely the lesson that was needed in my craft space and also the one I was most looking forward to. I love, love , love me some embellishing and getting to paw through my collection of pretty things is pretty darn close to heaven in my world. Making them organized and accessible – oh yeah, lets start singing the Hallelujah Chorus! I really love how Carson broke down this section – Alphabets & Chipboard first, onto Stickers & Ephemera second, Washi & Wood Veneer third, then all the other bits and bobs. Embellishments are such an eclectic mix of supplies that you’d be hard pressed to be able to list them in all their various forms. For a lot of crafters those middle four certainly seem to be the ones that are in large supply in most crafting spaces these days and depending on the amount of time you’ve been crafting, you may also have quite a number of supplies that are no longer in vogue… ahem, eyelets and brads anyone…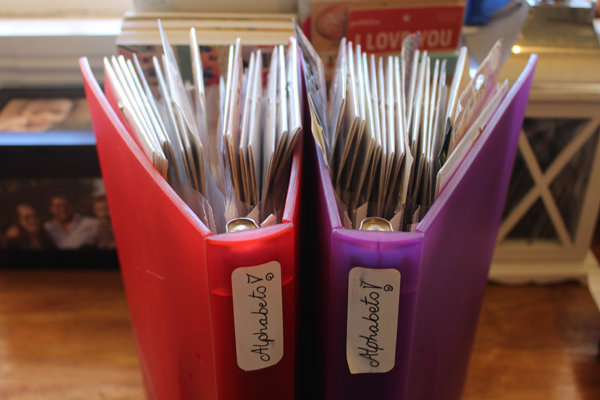 I may have been a little on the eager side to break into the Embellishments. Alphas were a great way to warm up before Stickers and Ephemera. I knew I’d bought some assorted alpha packs years ago at a cheap $2 Shop and it was about time a bunch of those got moved along. They must have been misprints or ill-aligned prints/cuts which didn’t bother me all those years ago but now they just needed to go. I also find when alphabets are a bunch of different colours they are so, so hard to use, at least six sets of rainbow Alphas didn’t make the cut. They always seem to make words where you use two or three of the colours and not in a pretty alternating way, but in an odd way and it just always ends up looking weird to me. I picked a few sets that are pretty much used up but that I still love which I’m going to challenge myself to use on upcoming projects or else they’ll get binned and four sets whose fonts seem a little dated to me got moved out of my general stash and into my Epic Exchange Album kit to be used with some of the older product already in use there. As far as chipboard goes I really only have 12×12 sets aside from a handful of loose generic shapes and the 12×12 chipboard lives on my paper rack so those were assessed during my paper purge which meant I pretty much skipped over that portion. So it was onto my favourite crafty supplies for a freshen up.
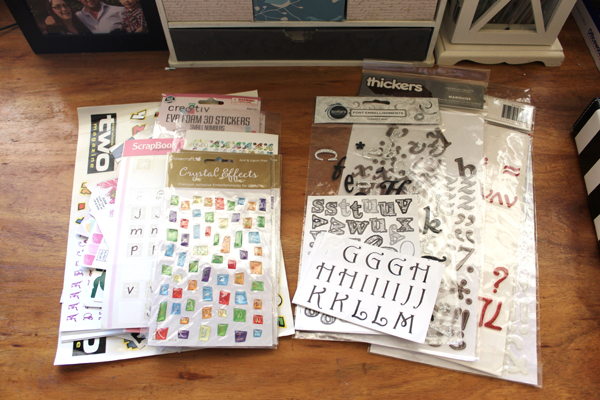
 I will admit that I am a bit of a sticker freak, none of the featured crafters in this portion of the class seem to have quite the same size sticker-stash as mine but I’m pretty sure just judging from some of the comments that there are other crafters doing the class that have a fair few more stickers (or other crafty supplies) than I do. In any case the tips and info given in the entirety of the class are pretty handy for coming up with solutions to tackle your own unique set of circumstances. Carson chooses to identify her stickers as either alpha stickers (as opposed to Thicker type materials) and image stickers and that works for her size stash. I on the other hand do not differentiate between materials used for Alphas and lump them all together as one (sticker, Thicker, rub-on etc) having purged and organized those in the last decluttering round. My image stickers on the other hand are sorted by theme and stored across three binders. I think this has a lot to do with the focus of our crafting efforts too. I am purely a 12×12 story focused, stash diving scrapper, she is an eclectic crafter who’s efforts run the gamut of cards, Project Life, layouts, mini’s & more. Sticker’s and Ephemera are my go-tos. Where as she (just from my gallery gazing) seems to work more with stamps, pocket albums and Studio Calico kits. Given the variety of sizes and themes of stickers I find binders and page protectors keep them corralled, view-able and easily accessible so I can identify the stickers I want to enhance or tell my story. Carson tends to have more similarly sized sticker sheets (probably from kit clubs) and given the smaller quantity can flick through in a matter of minutes to decide on what’s right for her particular project. So how’d I go decluttering? Well I’m pretty pleased with the amount of stickers I have on their way out of here. After my initial decision making efforts I was left with four different piles. Stickers that I either need to use or lose, stickers to pass on to my soon-to-be crafty friend, stickers to donate to my church and then stickers to go to the kids (in other words the ones that were as good as thrown out because they were about to be used up on art projects, the furniture and the inhabitants of our house in a matter of minutes). My binders seem thinner and that’s a plus but oh how I want to use them up. I have so many stickers that I could tell stories from and wrote a quick note on the back of some for later reference. They just spark all sorts of ideas for me and there are stories of my childhood, stories about my kids and so, so many others that were sparked just by going through them all.

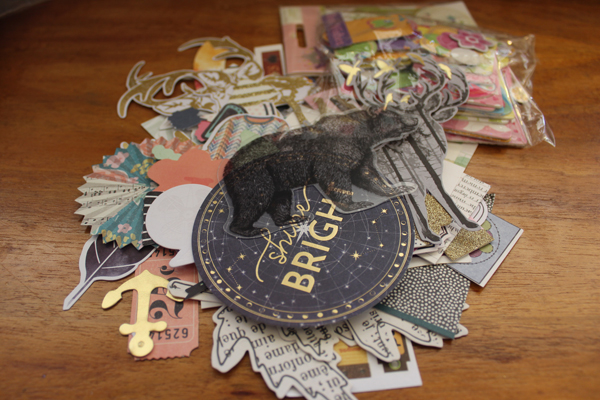
 As I said above the concepts for organization in this class can carry over from supply to supply, case in point my new method for organizing ephemera is taken directly from an idea shared for acrylic stamp storage in the previous portion of the class Craft Room Rehab: Stamps and Inks. Rianne Alonte, one of Carsons crafty contributors to the class, uses Avery Elle storage pockets for all of her acrylic stamps, while this may not be a new idea she further identifies them with washi tape and labels to denote brand and collection/stamp name. I thought it was genius, it makes my little organizational heart happy. I had already considered before class started that a more uniform Ephemera/Die-cut storage system was necessary and that Avery Elle pockets may just fit the bill but I am yet to order some. So for the moment I just went with what I had on hand and used some ziplock bags to coral my diecuts and organized them by brand using Rianne’s clever washi idea then added the names using my trusty labelmaker. It looks and works so much better already. It is beyond easy to find the exact set of ephemera/die-cuts that I want and get them on my layouts. I suppose I’ve kinda cheated on this one. I did remove a few excess ephemera pieces during my clean up but the majority of the ones shown were separated out to be used for happy mail and other things of that nature when I bought the packets. I’ve got into the habit of removing die-cuts I don’t like/don’t suit my style upon opening a new pack just so I don’t have to look at them every single time I want to find a die-cut.

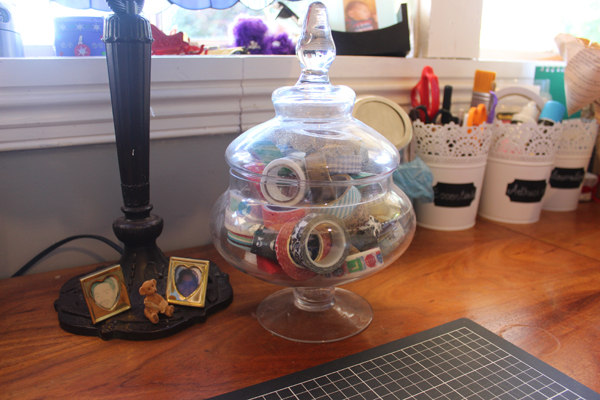
 Washi and Wood Venner were certainly the easiest supplies to cover for me. Washi tape is not really a big supply issue I have about 30 odd in total, all sweetly arranged in an apothecary jar right in front of my cutting mat and I love the mix of colours, and just like ephemera pieces they make me inspired and happy just looking at them. I removed five sets and in what is fast becoming a trend around here the kids ran off with at least one roll before I could say “But wait…”. As far as Wood Venner I still don’t own a single piece so instead I chose to peruse my collection of metal charms/embellishments instead however I didn’t feel the need to remove anything from there at this point in time. It feels so good to have parts of my stash like that, that are only filled with things I know I love and will use on layouts, now if only my entire craft room could stay like that, it would be wonderful.
 And finally we got to the what the Marie Kondo of Scrapbooking might call Komono. All that miscellaneous other stuff that we amass, the bits and bobs, the extras. For me this includes things like enamel dots, frames, rub-ons, assorted one-off paper embellishments, paper fasteners (like shaped paperclips or those little metal tear drop things), sequins, doilies, flowers, twine and of course my collection of brads, eyelets and ribbon. Not a lot went from here either. Two orange doilies and a couple of packs of sequins was about the extent of it. Perhaps I am burning out a little on the decluttering or maybe I really do just like all this stuff. But for the moment I am happy with the level of decluttering that’s gone on around here and the amount of supplies that have been moved on to other places.
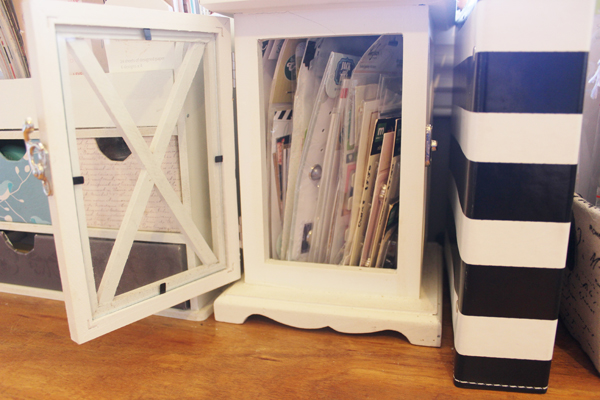
 Grouping my decluttering efforts by type rather than location like I did in my last decluttering effort in 2015 has really made it clear that I have quite the abundance of different spots where I house things of the same category and none more so than my collective haul of embellishments. They live in binders, drawers, baskets, jars, and even a lantern. Certainly it works for the way I craft and think of supplies but I have found myself jumping all over my craft room to work on this set of supplies or that set none of which seem quite as neglected as my paper/flat embellishments drawer. It’s where I house all the odd sorts of things that are one-offs or in limited supply and I rarely think to use them. The most used would be my supply of doilies but even my rub-ons are massively neglected when it comes to being the selected embellishment.
 While Carson has hinted that the next installment will cover tools (including dies, punches, adhesives, embossing supplies, along with others). I can only hazard a guess as to what else may be covered in the class in the future. She may have a portion on Mixed Media and while I have already covered my ‘wet media’ I neglected to think about my mixed media tools like stencils and masks, paintbrushes, mats etc. so I’ll add those in to the next section too. I’m not sure how many sessions of Craft Room Rehab will be made available in the end but I have determined that as far as I’m concerned other topics that may come up or that I need to cover are Resources, ie magazines & idea books, printed class materials. Kits, because I don’t subscribe to any kit clubs these will be the ones I’ve created for myself. Albums and Mini book supplies, including page protectors, binding materials, construction materials. Planner supplies, a lot of which have been covered in other sections but I wouldn’t mind creating a designated spot to house items I specifically want to use in my Memory Planner like particular stamps, stickers or washi rolls, even if it’s just as much a pencil case or something. Photos, Memorabilia and Other crafting (sewing, cross-stitch, knitting or whatever your side crafting hobby/hobbies are) however I suspect I will need at least another month to sort through a lot of that so some won’t be tackled in this round or crafty decluttering in January.
Save

 Because of my stampy struggles my most recently acquired stamps haven’t even seen the light of day on a layout. So I thought I’d start there. I’m talking the oh so beautiful Heidi Swapp Emerson Lane stamp set, my two Heidi Swapp Hawthorne stamp sets and this awesome One Little Bird + Studio Calico collab set that I got back when I did their Summer of Sketches class. It’s seen one planner page (which eventually got covered up) and then no more. I mean come on that xoxo and Good Vibes stamps are calling my name.
 In the interest of fair play I couldn’t let the opportunity pass to use some of my favourites from years past. Namely these lovely sets from Paper Chic that have the Fly and Happy Thoughts sentiments and the awesome Kelly Pannaci calendar stamp and journaling block sets. I’ve also got these Creative Expressions sets that are from about the same time that have rarely been used that need a bit of attention.
 In the spirit of what’s old is new that I love so much, I’ll also be giving my oldest stampy sets some air time too. I’m talking good ol’ foam stamps, these fun rubber stamps (the very first in my stampy collection) and of course giving some love to my very own handmade stamps that I created at Uni – best assignment ever! I want to play with the different effects and mediums that I can get/use with these delightful beauties and do a little experimenting.
 Then let’s round out the month with some new-to-me stampy supplies in the form of Stamp and Die sets from Kaisercraft which I got as gifts last year from the family. I have never used a stamp and die sets but given my affection for the die-cut I think I’m in with a pretty good chance of loving these. I’ve got a few fun ideas up my sleeve for these two lovely beauties.
 I hope you’ll join me for this month of stamping fun and if you’ve got any pointers for me in the stamp department I’m all ears be sure to leave me a comment below and give a girl a few tips.


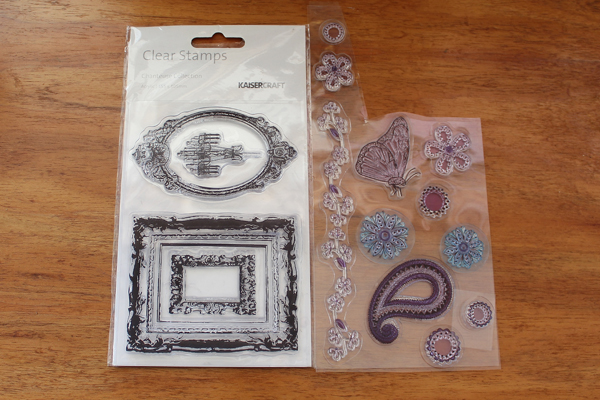 I keep my everyday collection of clear stamps in an A5 Binder and use Kaisercraft Ziplock storage pockets to keep them in. The binder was just one I found floating around the house and the pockets were clearanced somewhere years ago, so it’s a pretty economical storage solution. It’s pretty much at capacity but the acquisition of a Heidi Swapp background stamp in my last purchase meant that I needed to ‘swap’ out another stamp to make room for it. The only one that wasn’t working for me was this butterfly and flower set. It’s not a quality stamp set and to be honest I don’t really like it anymore. I did however cut out the large butterfly that was on it because it’s probably the only image I will use in future. I also discovered I had an extra stamp set from the Kaisercraft Chartuese Collection so I’m passing that on along too. In addition I have another five Christmas sets that just permanently move from December Daily kit to December Daily kit so it might be an idea to find a more permanent home for them in the future, but I’m okay with how they are for now.
 The rest of my stamp collection lives in some photo boxes and for the amount of times I use these things most all of them could be moved along (except for the ones on the acrylic blocks which I made myself, I’d totally keep them for sentimental reasons) but I figure in the grand scheme of things, the box isn’t needed for anything else right now so they can stay. It’s a bit of a hodge-podge of foam stamps, rubber stamps and wood-mounted stamps. I also have a set of Making Memories Foam stamps and a Typo DIY stamp kit that are stored with my acrylic blocks in their packages. I’ve probably used the Making Memories set the most of all of them but I am yet to settle on a design and carve my stamps from the Typo kit. I took out seven stamps that were never going to see the light of day and passed them on to the kids who promptly got stamping with them and the ink pads I discarded as well so they’re already getting more use than I ever gave them.
 Next in line was all my ink pads and stamping equipment. My Ink pads got a bit of a tidy up and I threw out a dodgy black ink pad that never created a clean image for me along with giving the kids three others, cheap ink pads all of them, so it would seem I’m becoming a bit of a stamping snob now that I’m buying Stayz On inks (ha). Of my stamping equipment two acrylic blocks didn’t make the cut because I had three of the same size. But they’ll work nicely being passed on to my new scrappy recruit with those stamp sets. I also have my most used inks in the Kaisercraft desk unit – a black Versafine and a Moonlight White Dew Drop ink with some little planner stamps and acrylic blocks, that I use for noting down tasks and marking off goals.
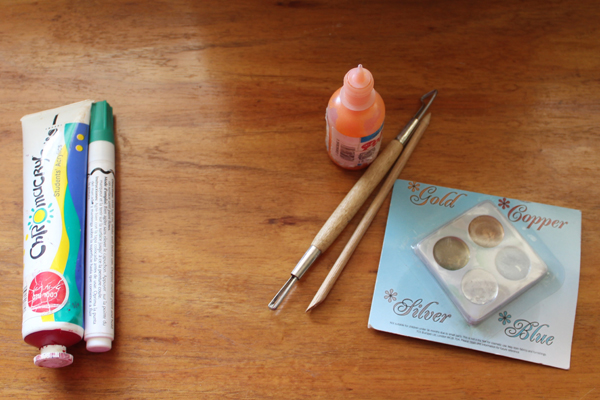 When it comes to mixed media I didn’t get rid of much here either, a dried up tube of red paint and a green paint pen got thrown out, a bottle of orange puffy paint, some clay tools I had to buy for uni and never used and some metallic media for using with dry embossed images got passed along. I would have given the kids a large bottle of blue paint too until I realized I didn’t have any small tubes of blue paint. But as soon as I restock it’ll move on out too. The only things in my accumulation of stampy stuff that saw no change were my roller stamps and my alphabet stamps. I have a total of six roller stamps and four of those are the handy October Afternoon Daily Flash Decade stamps which I use for dating all my layouts. In the Alpha stamp department, there’s three that are ear-marked for a future purge but that I do use on occasion for my Exchange Album as a matter of continuity and like my random stamps, their presence in my scrappy stuff isn’t a problem cos they don’t take up much room and I don’t need the space for anything new.

